VPN – school access from home
To access certain school digital resources from home, you need to install GlobalProtect, the VPN client used by Høyskolen Kristiania.
Install GlobalProtect on Windows
Use your school account to connect to the VPN. If you do not remember your password, you can reset it here. If you do not have a school account, please contact us here.
Install GlobalProtect on Windows
This guide is based on Windows 11. Other versions of Windows may look slightly different, but will generally work in the same way. We recommend keeping Windows updated to the latest version whenever possible.
Follow the instructions carefully to avoid mistakes.
- Download the GlobalProtect installation file here: GlobalProtect for Windows
- When the download is complete, double-click the file to open it.
- Follow the installation steps. You do not need to change any of the default settings. Click “Yes” if Windows asks whether you want to allow the app to make changes to your device. Close the installer when the installation is complete.
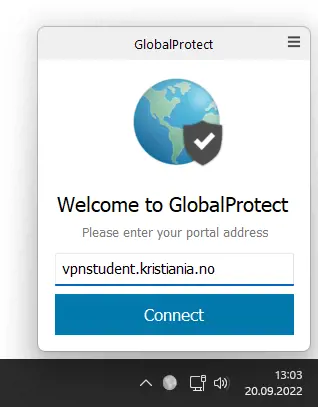
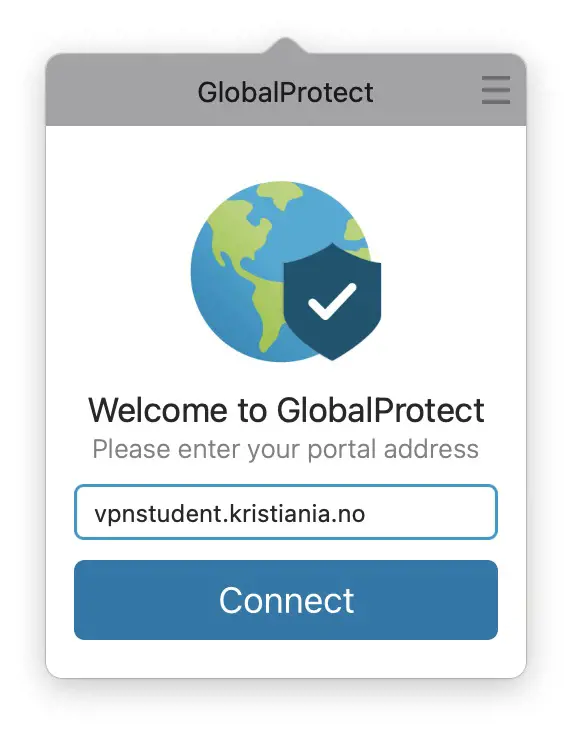
- You should then see a small window titled “Welcome to GlobalProtect.” In the Portal Address field, enter vpnstudent.kristiania.no, and then click “Connect.”
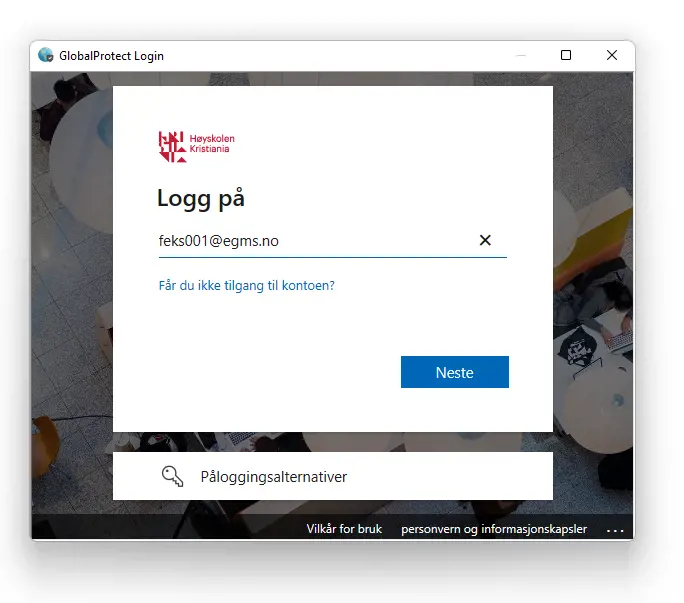
- Another window will open and ask you to log in. For username and password, enter “[username]@egms.no” and your password, and click “Sign In”.


Incorrect username or password?
Go to https://brukeradm.kristiania.no and click “Forgot username” to receive your username, or “Forgot password” to reset your password.
Then sign in to GlobalProtect again.
6. Click the small “roof” to the right of the Taskbar to see apps that are running in the background. You will see a small globe: this is GlobalProtect.

7. Click on the GlobalProtect globe to open the window to connect to and disconnect from the VPN. If the globe is in colour and has a small shield on it, you are connected to the VPN. If the globe is grey, you are disconnected.

Install GlobalProtect on Mac
This guide is based on macOS 13 Ventura and newer. Screens may look slightly different in older versions, but the procedure is the same.
Follow the instructions carefully to avoid mistakes.
To log in, use your Feide user.
- Download the GlobalProtect agent for Mac.
- When the download is complete, double-click the file to open it.
- Install the application:
Follow the installation wizard. When prompted, check the box for GlobalProtect System Extensions.
Enter your Mac password when requested.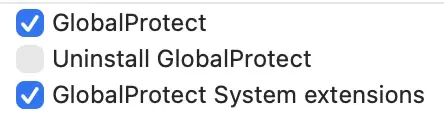
- Approve system extensions
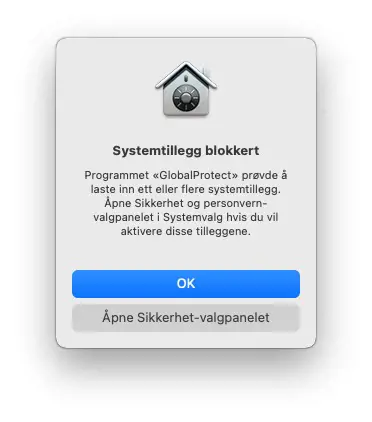
If you see a message saying “System Extension Blocked”, do the following:


- Click Open Privacy & Security.
- At the bottom of the Privacy & Security tab in System Settings, click Allow next to the message:
“System software from developer Palo Alto Networks was blocked.” - Close System Settings.
5. Complete the installation. Click Close when the installation is finished.
6. Connect to the VPN
-
Click the GlobalProtect icon (a small globe) in the menu bar.

-
Enter the portal address: vpnstudent.kristiania.no
-
Click Connect.
-
Log in using your school account:
Username: [your username]@egms.no
7. If you see the message “GlobalProtect would like to filter network content”, click Allow.
Password: [your password]


8. Confirm connection: When you are connected, the globe icon will turn black with a shield.
To disconnect, click Disconnect.
Uninstall GlobalProtect on Windows
This tutorial shows you how to uninstall GlobalProtect from your computer.
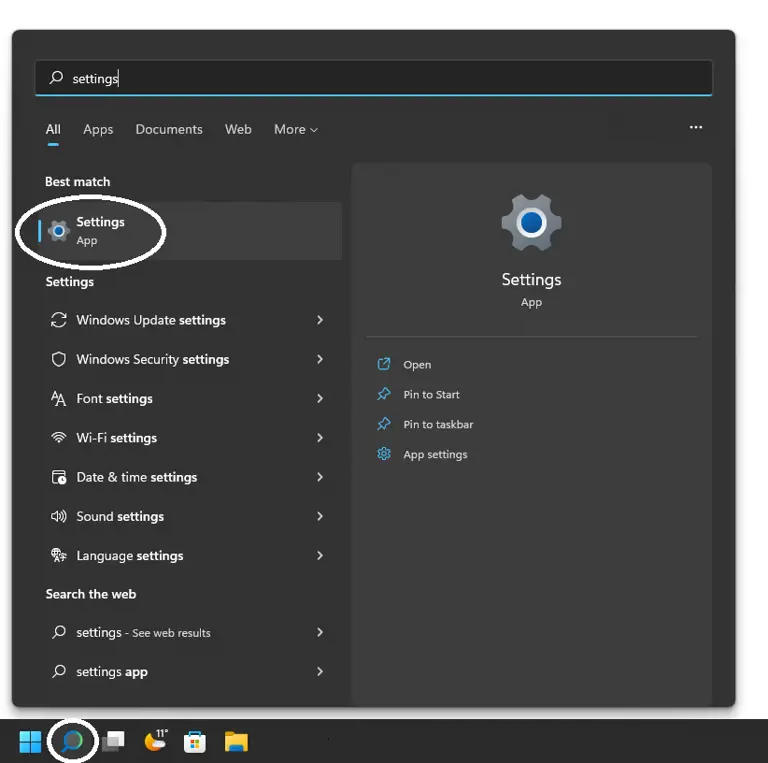
- Click on the gear wheel in the Start menu to open the Windows settings.
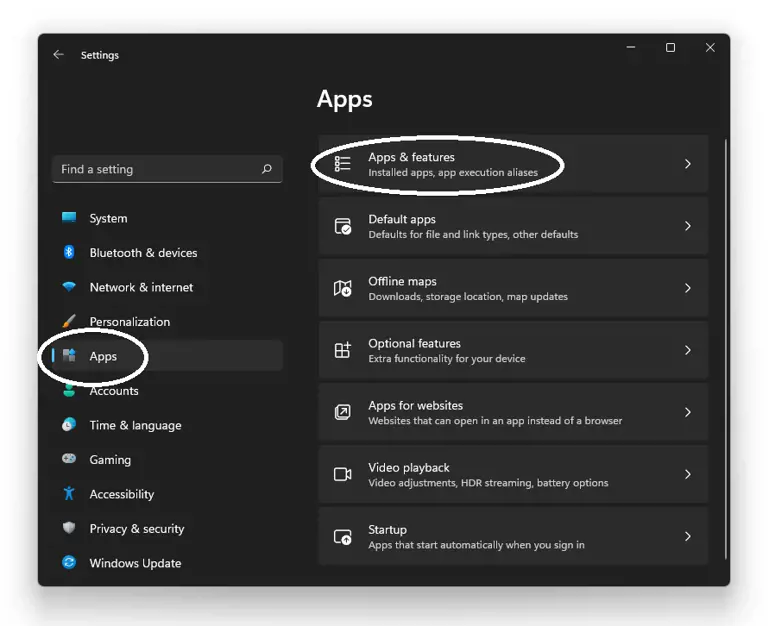
- Select “Apps”.
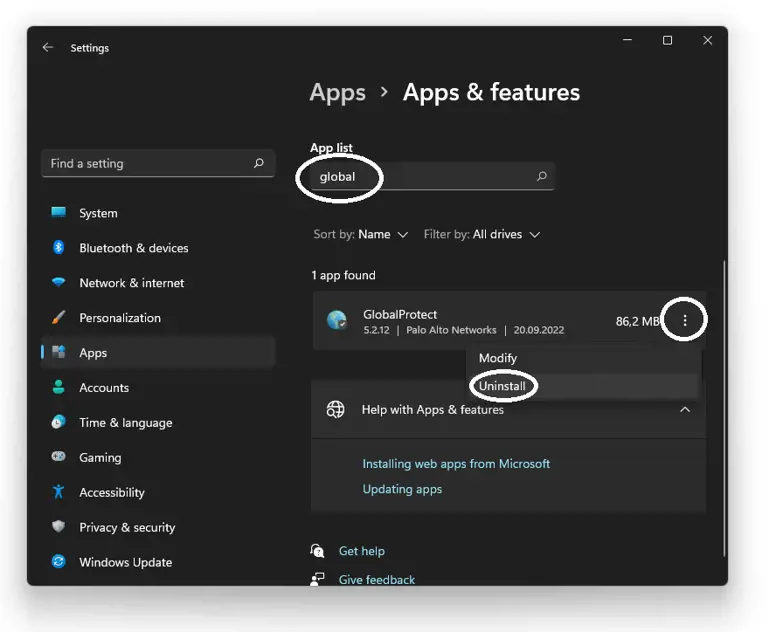
- Search for “Global”, click on it in the list, select “Uninstall” and then “Uninstall” again.
- Allow the app to make changes to your computer.
- Close Settings.


To reinstall the VPN, go back to the tutorial.
Uninstall GlobalProtect on Mac
- Download the same installation file used for the installation.
- Open the file and select Uninstall GlobalProtect instead of Install.

- Complete the uninstallation.
